
Tags: Visual Studio, OpenGL ES 3.2 on Desktop, GLFW, GLAD, Win32, C++, Cross-Platform Foundation
Using OpenGL ES on the PC is less straight forward than on Android. The reason is that GL ES is intended for mobile devices, NOT for desktops. Fortunately, solutions exist. OpenGL producers strongly advise to use a window toolkit (GLFW) and an OpenGL loading libraries (GLAD). Well, let’s download them.
1. Create a placeholder for these libraries.
In Windows File Explorer in our root C:\CPP folder create subfolder “p_windows” (“p” is for “platform”). We’ll keep there all platform-specific stuff that is applicable to ALL our projects.
2. Download GLFW
Go to https://www.glfw.org/
Proceed to Download link on top.
We need 64-bit Windows pre-compiled binaries.
After download finished, in Windows File Explorer go to your Downloads folder,
unzip glfw-3.3.8.bin.WIN64.zip:
- right-click on file
- Extarct All.
- IMPORTANT: Change the destination (Copy to) to C:\CPP\p_windows\
- Extract.
In Windows File Explorer go to C:\CPP\p_windows\ folder and rename
extracted glfw-3.3.8.bin.WIN64 folder to glfw338win64.
3. Download GLAD
First – add subfolder “glad” under C:\CPP\p_windows\.
Then – go to https://glad.dav1d.de/
- Language: C/C++,
- Specification: OpenGL
- Change Profile to Core
- Under gles2 pick Version 3.2
- Scroll down
- Leave “Generate a loader” selected
- Click Generate
- On the next screen click on “glad.zip” to download
- When downloaded, go to Downloads folder and unzip glad.zip to C:\CPP\p_windows\glad
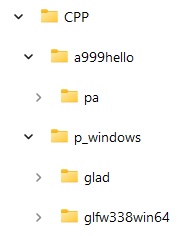
Now our folders structure is:
4. Create VS project.
GLFW website has a nice tutorial/sample, which we will use here. This sample was intended for OpenGL ES 2.0. To make it compatible with 3.2 I had to modify it a bit. Also, it uses GLFW to create a window, so we will create not “window”, but Console project.
So, open Visual Studio, Create a new project, pick Windows filter, pick Windows Desktop Wizard, then – Next
- Project name – “pw” (“p” for “platform”, “w” – for “windows”)
- Location – C:\CPP\a999hello
- Place solution and project in the same directory – yes (check)
Then – Create.
On the next screen pick “Console Application (.exe)” and “Empty project”:
Then – Ok.
5. Source code.
Right-click on “pw” project (not on solution), then Add -> New item.
On <Add New Item> screen pick “C++ File (.cpp)”, name – “main.cpp”:
Then – Add.
Copy-Paste following code to main.cpp:
#include <glad/glad.h>
#define GLFW_INCLUDE_NONE
#include <GLFW/glfw3.h>
#include "linmath.h"
#include <stdlib.h>
#include <stdio.h>
static const struct
{
    float x, y;
    float r, g, b;
} vertices[3] =
{
    { -0.6f, -0.4f, 1.f, 0.f, 0.f },
    {  0.6f, -0.4f, 0.f, 1.f, 0.f },
    {   0.f,  0.6f, 0.f, 0.f, 1.f }
};
static const char* vertex_shader_text =
"#version 320 es\n"
"precision lowp float;\n"
"uniform mat4 MVP;\n"
"in vec3 vCol;\n"
"in vec2 vPos;\n"
"out vec3 color;\n"
"void main()\n"
"{\n"
"    gl_Position = MVP * vec4(vPos, 0.0, 1.0);\n"
"    color = vCol;\n"
"}\n";
static const char* fragment_shader_text =
"#version 320 es\n"
"precision lowp float;\n"
"in vec3 color;\n"
"out vec4 FragColor;\n"
"void main()\n"
"{\n"
"    FragColor = vec4(color, 1.0);\n"
"}\n";
static void error_callback(int error, const char* description)
{
    fprintf(stderr, "Error: %s\n", description);
}
static void key_callback(GLFWwindow* window, int key, int scancode, int action, int mods)
{
    if (key == GLFW_KEY_ESCAPE && action == GLFW_PRESS)
        glfwSetWindowShouldClose(window, GLFW_TRUE);
}
int main(void)
{
    GLFWwindow* window;
    unsigned int vao_buffer;
    unsigned int vertex_buffer, vertex_shader, fragment_shader, program;
    int mvp_location, vpos_location, vcol_location;
    float angle_z = 0;
    glfwSetErrorCallback(error_callback);
    if (!glfwInit())
        exit(EXIT_FAILURE);
    glfwWindowHint(GLFW_CONTEXT_VERSION_MAJOR, 3);
    glfwWindowHint(GLFW_CONTEXT_VERSION_MINOR, 2);
    window = glfwCreateWindow(640, 480, "Hello Windows", NULL, NULL);
    if (!window)
    {
        glfwTerminate();
        exit(EXIT_FAILURE);
    }
    glfwSetKeyCallback(window, key_callback);
    glfwMakeContextCurrent(window);
    gladLoadGLES2Loader((GLADloadproc)glfwGetProcAddress); //gladLoadGL(glfwGetProcAddress);
    glfwSwapInterval(1);
    // NOTE: OpenGL error checks have been omitted for brevity
    glGenVertexArrays(1, &vao_buffer);
    glBindVertexArray(vao_buffer);
    glGenBuffers(1, &vertex_buffer);
    glBindBuffer(GL_ARRAY_BUFFER, vertex_buffer);
    glBufferData(GL_ARRAY_BUFFER, sizeof(vertices), vertices, GL_STATIC_DRAW);
    vertex_shader = glCreateShader(GL_VERTEX_SHADER);
    glShaderSource(vertex_shader, 1, &vertex_shader_text, NULL);
    glCompileShader(vertex_shader);
    fragment_shader = glCreateShader(GL_FRAGMENT_SHADER);
    glShaderSource(fragment_shader, 1, &fragment_shader_text, NULL);
    glCompileShader(fragment_shader);
    program = glCreateProgram();
    glAttachShader(program, vertex_shader);
    glAttachShader(program, fragment_shader);
    glLinkProgram(program);
    mvp_location = glGetUniformLocation(program, "MVP");
    vpos_location = glGetAttribLocation(program, "vPos");
    vcol_location = glGetAttribLocation(program, "vCol");
    glEnableVertexAttribArray(vpos_location);
    glVertexAttribPointer(vpos_location, 2, GL_FLOAT, GL_FALSE,
        sizeof(vertices[0]), (void*)0);
    glEnableVertexAttribArray(vcol_location);
    glVertexAttribPointer(vcol_location, 3, GL_FLOAT, GL_FALSE,
        sizeof(vertices[0]), (void*)(sizeof(float) * 2));
    while (!glfwWindowShouldClose(window))
    {
        float ratio;
        int width, height;
        mat4x4 m, p, mvp;
        glfwGetFramebufferSize(window, &width, &height);
        ratio = width / (float)height;
        glViewport(0, 0, width, height);
        glClear(GL_COLOR_BUFFER_BIT);
        mat4x4_identity(m);
        mat4x4_rotate_Z(m, m, (float)glfwGetTime());
        mat4x4_ortho(p, -ratio, ratio, -1.f, 1.f, 1.f, -1.f);
        mat4x4_mul(mvp, p, m);
        glUseProgram(program);
        glUniformMatrix4fv(mvp_location, 1, GL_FALSE, (const GLfloat*)mvp);
        glDrawArrays(GL_TRIANGLES, 0, 3);
        glfwSwapBuffers(window);
        glfwPollEvents();
    }
    glfwDestroyWindow(window);
    glfwTerminate();
    exit(EXIT_SUCCESS);
}
- ES 3.2-related changes are highlighted.
6. Also this sample uses “linmath.h”- a nice little library for linear math by datenwolf.
You can download it here.Since we will use it in other projects too, let’s place it outside of a999hello folder.
In Windows File Explorer create a new folder for it: C:\CPP\engine\
Copy downloaded linmath.h file from Downloads directory to
C:\CPP\engine\
In Visual Studio right-click on pw project -> Add -> New Filter.
Name – xEngine
- “Filter” – is kind of virtual sub-folder inside of VS project.
- “x” before “Engine” – just to keep it after “Source Files” (it will be after when You open VS next time).
Now – right-click on xEngine -> Add -> Existing Item
C:\CPP\engine\linmath.h
7. Also we need to add glad.c file (from GLAD download) to the project.
Right-click on “Source Files” -> Add -> Existing item
C:\CPP\p_windows\glad\src\glad.c
Add.
8. Now we need to include references to downloaded libraries.
Right-click on “pw” project -> Properties.
IMPORTANT: Change Configuration from “Debug” to “All configurations”. Also, make sure that platform is set to x64.
Now navigate to Configuration properties -> C++ -> General and open Additional Include Directories -> Edit:
In the Edit window add new line
and manually add (copy-paste)
..\..\p_windows\glad\include (“..\..” means 2 folder levels up),
Then add another new line and add
..\..\p_windows\glfw338win64\includeAdd another new line and add
..\..\engineThen – Ok.
9. Now navigate to Configuration properties -> Linker -> General and open Additional Library Directories -> Edit.
Add new line and add
..\..\p_windows\glfw338win64\lib-vc2022Then – Ok.
10. Now move to Configuration properties -> Linker -> Input and open Additional Dependencies -> Edit.
Copy-Paste following libraries:
glfw3.lib; glfw3dll.libOk, Apply, Ok.
11. One more thing: We don’t want our resulting executable to be called “pw.exe” (as it is defined by project/solution name). We can change it in project properties. Right-click on pw project -> Properties -> Configuration Properties -> General, pick Target name. To change it – click arrow-down, then Edit. Change name to “HelloWindows”. Then – Ok, Apply, Ok.
12. Now let’s try to run (green arrow).
Make sure that selected platform (in the top menu) is set to x64.
Works:

Sample is running, but it has TWO windows: Console window AND Application window. The reason is that we didn’t want to create our window the “Windows way”, that’s why we picked “Console application” and then created our window using GLFW.
How to rid of Console window:
13. Actually, having Console window is quite beneficial, since It can handle printf statements (OpenGL window can’t), which is priceless for development, so we’ll better keep Console window in Debug configuration as is, but will rid of it in Release.
Right-click on “pw” project, open Properties.
Change Configuration to Release.
Go to Configuration Properties -> Linker -> System and change SubSystem from Console to Windows
Apply, Ok.
Now, if we will try to compile our program (just don’t forget to switch to Release configuration) we’ll get an error:
Error LNK2001 unresolved external symbol WinMain
This is because now (after switch) linker is looking for a WinMain() entry point, not a main() one.
If we want to keep our main() entry point (we do), we need to set the entry point to mainCRTStartup under Advanced Linker.
So, again, open project Properties, Release configuration.
Go to Configuration Properties -> Linker -> Advanced. Open Entry Point -> Edit. Change to mainCRTStartup
Ok, Apply, Ok.
Now Debug configuration works with Console window, Release – without.

Just in case, both Android and Windows solutions are saved on GitHub.
Link: https://github.com/bkantemir/_wg_403
- All pathes in both projects are relative, so it is safe to rename unzipped folder at your discretion,
WARNING: In the Android project, in case of renaming project directory, build.gradle can be confused and will give an error:
[CXX1409] C:_wg_403\a999hello\pa\app.cxx\Debug\1f254h29\arm64-v8a\android_gradle_build.json debug|arm64-v8a : expected buildFiles file 'C:\CPP\a999hello\pa\app\src\main\cpp\CMakeLists.txt' to existThis is because (in my case) original project was build in C:/CPP/a999hello directory, and now I am trying to run it from C:/_wg_403/a999hello. If you encounter this problem, don’t worry, it’s easy to fix:
Just follow the link in the error message and fix the problematic references (there are 4 places in the file to fix). Like in this sample, from C:/CPP/a999hello to C:/_wg_403/a999hello.