
1. Google “Visual Studio download”. Proceed to https://visualstudio.microsoft.com
Continue to Download Visual Studio -> Community 2022 (or whatever is current). Download and start installer.
2. On Workloads page pick “Desktop development with C++”.
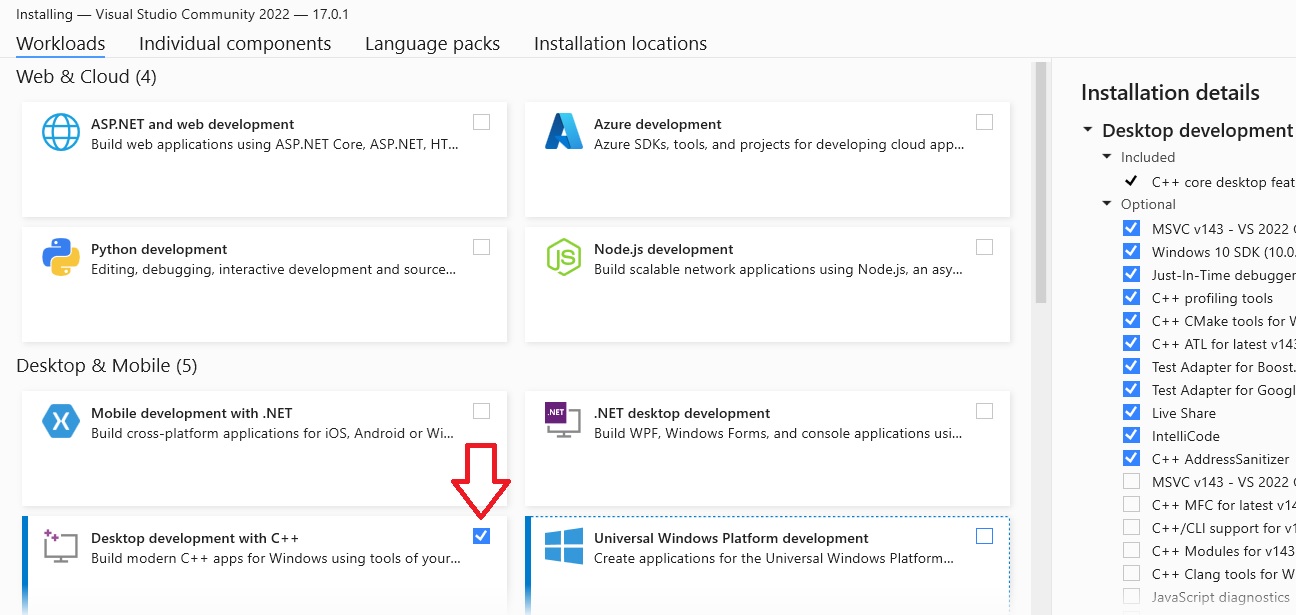
- Don’t need extra components so far, so use default settings (on the right-hand side panel). If necessary, we can install them later.
3. Since we want to target Android too, we’ll also need “Mobile development with C++”.
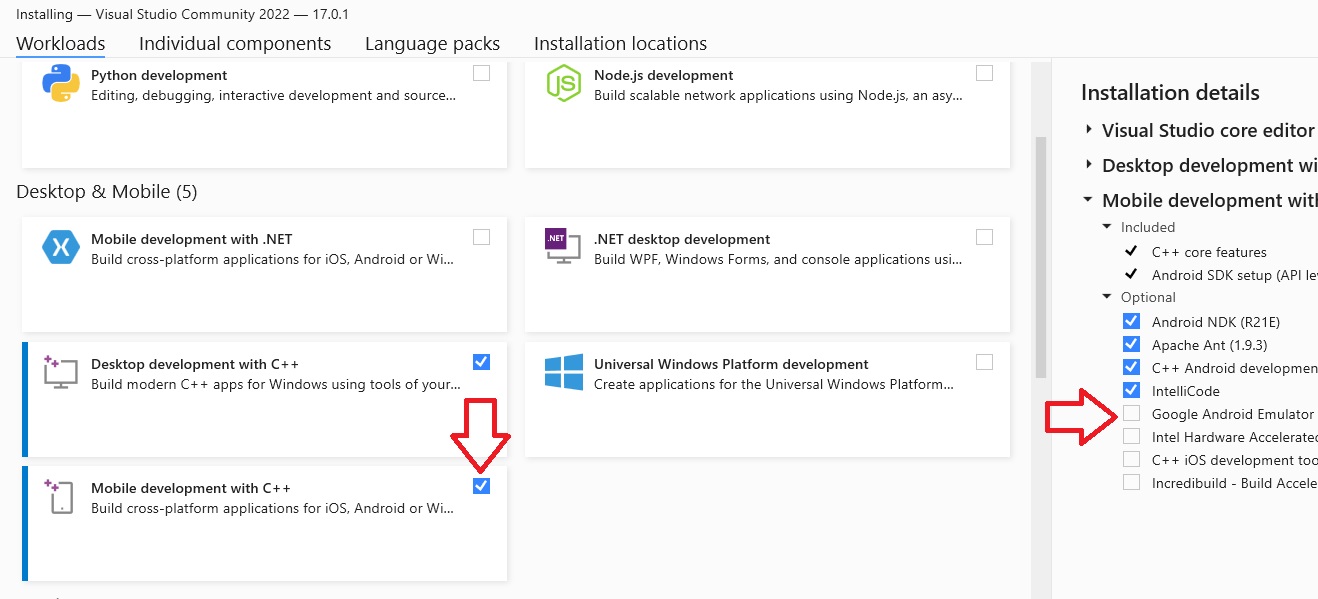
- Just in case, Android SDK and NDK are included, so don’t need to download them separately.
- If you don’t have an Android device under the hand, theoretically you can pick an emulator (on the right-side panel), though I would not recommend that, it is better to work with a real device.
Then – Install.
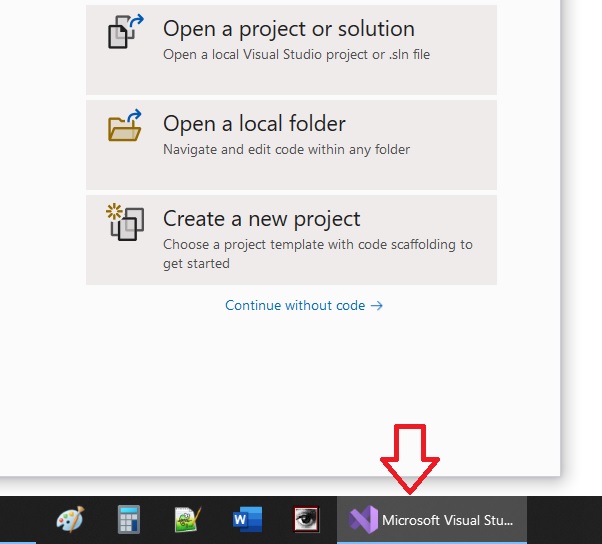
- Start Visual Studio (you can access it from Windows Start menu). If it’s the first start, it will ask to register. Won’t hurt. Now, since we’ll need it quite often, pin VS icon to the taskbar: Right-click on VS icon on the bottom of the screen and pick “Pin to taskbar”:
Now, when Visual Studio is up and running, let’s close it so far and let’s talk a bit about our project structure and our next steps.
The plan is to create 2 simple C++ projects first (one for PC, and one for Android). After that we’ll see which parts of code are platform-specific and what can be shared between platforms, which will give us an opportunity to build a cross-platform solution. Then – everything else: graphics, 3D, interactivity, and so on.
First step is to prepare a placeholder for our project.
*VERY IMPORTANT part missed in most tutorials – how to organize your folders.
So, first – root folder, where we’ll keep all our projects. I’ll call it “CPP” (for C++). Do NOT create it from Visual Studio (VS will place it somewhere on it’s own discretion). Do NOT create it on your desktop or in Documents folder. Open Windows File Explorer and create “CPP” folder on your local hard drive (usually C:).
Inside of “/CPP” let’s create a folder for our first project. Instead of “Project1” I’ll better call it “a999hello”. Why “a”, why “999”? Well… In my case next project will be “a998” and so on, so the latest one will be always on top of the list. Inside of a999hello we’ll later add root folders for Android, PC (and later maybe for Mac, iPhone, etc.) versions of a999 project. So, the structure is: C:/CPP/a999hello/.
Done? Congratulations! Don’t underestimate an importance of this little step. Mark today’s date, maybe it’s a START of your New Big Project!